

While the text of your blog posts is incredibly important, so are the images you choose for them. Every blog post needs images. They help attract your audience’s attention, and they help explain the concepts you’re discussing in your article. In this post, we’ll explain how to find great blog images and how to optimize them for search engines.
Estimated reading time: 8 minutes
Table of contents
Tips on finding great images
Unfortunately, you can’t just use any picture you want that you find online. (You’d be surprised how many people still do this anyway, and end up in trouble.) Our first tip is to make sure you don’t violate any copyrights when using an image on your website. The last thing you need is a copyright violation lawsuit on your hands for stealing someone else’s work without crediting them.
Second, make sure your images actually fit the topic of your blog post. The images you choose should make people want to read your post or explain something you’ve written about in your post. Text and picture should be about the same topic; they should reinforce one another.
Keep Reading: How To Write A Blog Post
Lastly, think about where you want to get images from. There are plenty of online databases with images you can either purchase or use for free. Some of our favorites are Unsplash, Shutterstock, Yayimages, Pixabay, and Librestock. Just make sure you avoid the obvious stock photos and try to find something a bit more unique! Another option would be to take or create (with tools like Canva) your own photos. This will ensure that no one else has images like yours and can give your posts a unique feel to them that fits your brand. Yet another option is to hire an illustrator, if you have enough money in your budget to afford it.
What to do to your images BEFORE you upload
Once you have found the right blog image – whether it’s a photo, illustration, or chart – the next step is to optimize it for use on your website. Before you upload your images to your WordPress site, follow this checklist:
1. Choose the right file name
Make no mistake: Google reads your file names. This is how Google knows what to rank in its Image search. You want Google to know what the image is about without even having to look at it. This gives the image that much more of a chance at ranking, along with the article associated with it.
What is the right file name? One that contains your focus keyword. For example, if you are writing a post about your bakery’s top ten Christmas desserts, the file name shouldn’t be TDC2182.jpg. Instead, you could name it something like christmas-dessert-gingerbread-cookies.jpg.
2. Choose the right file format
The right file format for a particular image depends on how you plan to use that image. In general, we recommend using:
- JPG for larger photos or illustrations
- PNG to preserve background transparency
- SVG for logos and icons
- or, use WebP instead of JPEG and PNG. It will produce high-quality results with smaller file sizes. You can use tools like Squoosh to convert your image into WebP.
If you want to optimize your blog posts even further, you can convert your JPG and PNG images to WebP format. WebP produce high-quality results with smaller file sizes. Our favorite tool for converting to WebP is Squoosh.
Regardless of the file formats you choose, you should always check to see if that format is supported by the browsers your visitors are using. After you’ve chosen the right file name and format, it’s time to resize and optimize your blog image!
3. Resize your image
Images can have a big impact on the speed of your website. If you upload an image at full size, but only display it at 250 x 150 pixels, your website still has to load the entire image. This can add several seconds to the load time for that page, which can annoy your visitors and send them elsewhere for whatever it is they’re looking for. In that sense, the size of your images very much impacts your SEO. Resize your images to the size you want them to display, then upload them.
4. Reduce the file size
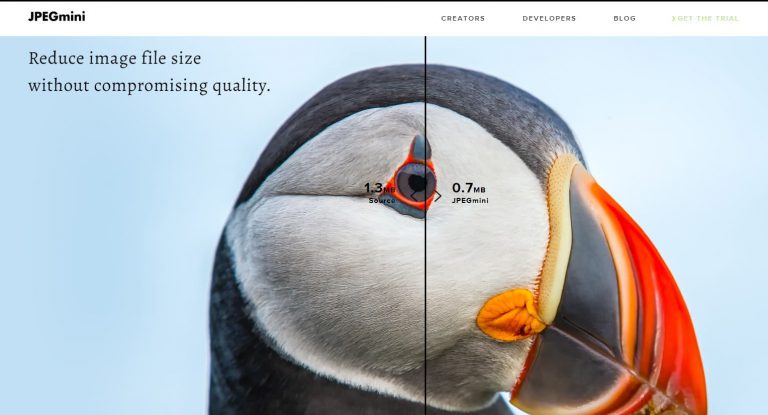
The last step before uploading your image to your blog post is compressing it. This ensures it will be served in the smallest file size possible with the highest quality. You can use tools like ImageOptim, Squoosh, JPEGmini, jpeg.io or Kraken.io to help with this step.
Adding the image to your article
Your image is now ready for uploading to your WordPress site! However, you don’t want to just put it anywhere in your blog post. Put it close to related textual content, so your readers (and Google) can better understand the image. Google is getting smarter by the day. But it still isn’t 100% there when it comes to understanding what is in an image just by looking at it.
This is why you need to provide some extra context for Google by providing a bit more information about your image. In the following sub-sections, we’ll talk about what sort of information you should provide.
Add captions
Captions are important for your image SEO, because people read them as they scan through your article, along with headings, bold text, bulleted lists, and your images themselves. In 2012, KissMetrics stated that captions under images are read 300% on average than the body of your article.
This doesn’t mean you have to add a caption to every image just for SEO’s sake. Just as you can overoptimize your blog post content, you can overoptimize your images, too. Therefore, you should only add captions where it makes sense for one to be there. Just like anything else, think about the visitor first and what they expect to see.
Add alt text
When you upload an image into the WordPress Media Library, you can click on that image to see the Attachment Details. On the far right of that pop-up window, you will see a field that says alt text. The alt text is essentially what will display if your image cannot be displayed to your visitor for whatever reason. Wikipedia explains it nicely:
“In situations where the image is not available to the reader, perhaps because they have turned off images in their web browser or are using a screen reader due to a visual impairment, the alternative text ensures that no information or functionality is lost.”
The alt text you write should describe what is in the image. This way, both search engines and people can make sense of it. Be sure to add alt text to every image you use, and make sure you include your SEO keyword in the alt text, if you are actively optimizing it. However, do not simply stuff your keyword in there, as this does nothing to help your visitors or the search engine, which is the purpose of alt text to begin with.
A word about title text
According to Mozilla, title text presents many accessibility problems, centered around unpredictable screen reader support. Most browsers will not show title text unless you hover with a mouse, which means keyboard-only users will not even see it.
In that case, we recommend leaving out title text altogether in your images. If you include great alt text, that will tell your visitors everything they need to know about the image(s) you’ve included in your post.
Images for social sharing
If you plan on sharing your blog posts on social media, or allowing your visitors to share them on their own social profiles, you should take the time to create great images for those channels.
Tools like Canva are great for this, because they come with free templates for social media posts on networks like Facebook, Twitter, and Instagram. If you use these templates, you can rest assured that your image will be high quality, and it won’t be cut off or distorted whenever someone decides to share it online.
For any website we develop here at MotorClick, we use Yoast SEO, which includes a Social Section inside the post editor that allows you to set your preferred social sharing images. So, if you have special images set aside just for sharing online, don’t forget to set those whenever you publish a post!
Using an image CDN
CDN stands for Content Delivery Network. CDNs are a great way to optimize the speed of your website, particularly when it comes to blog images. Some companies provide separate CDNs just for images, to serve them to your visitors as fast as possible.
Image CDNs typically come with loads of options to help you fine-tune the image loading process. However, for most sites, the default settings work just fine. While a CDN is not required, it can substantially improve image loading times for your website, which will improve your site’s use experience and, with it, your SEO.
There are loads of image CDNs to choose from, like Sirv, Cloudinary and Imagekit. Also, platforms like Cloudflare let you determine how to resize, reformat and serve images.
Wrapping up
To summarize what we talked about in this post, here are a few important things to remember when it comes to optimizing images for your blog posts:
- Use relevant images that relate to your content
- Choose the right file name and format
- Make sure image dimensions match the image size as displayed
- Reduce file size for faster loading
- Add a caption, if appropriate
- Use alt text for every image
- Consider serving images via a CDN
Your images can make or break your site’s SEO and user experience. Not only that, but they can also contribute to conversion rates among your customers. So don’t wait any longer; get started optimizing your blog’s images today!
Read More: 8 Things Every Good Website Should Have